A dormer loft conversion can turn dusty roof space into a comfortable bedroom, office or playroom, but the options can feel confusing. Understanding the main dormer styles, their pros and cons, and how they affect your home makes it much easier to choose the right design.
What a dormer loft conversion actually is
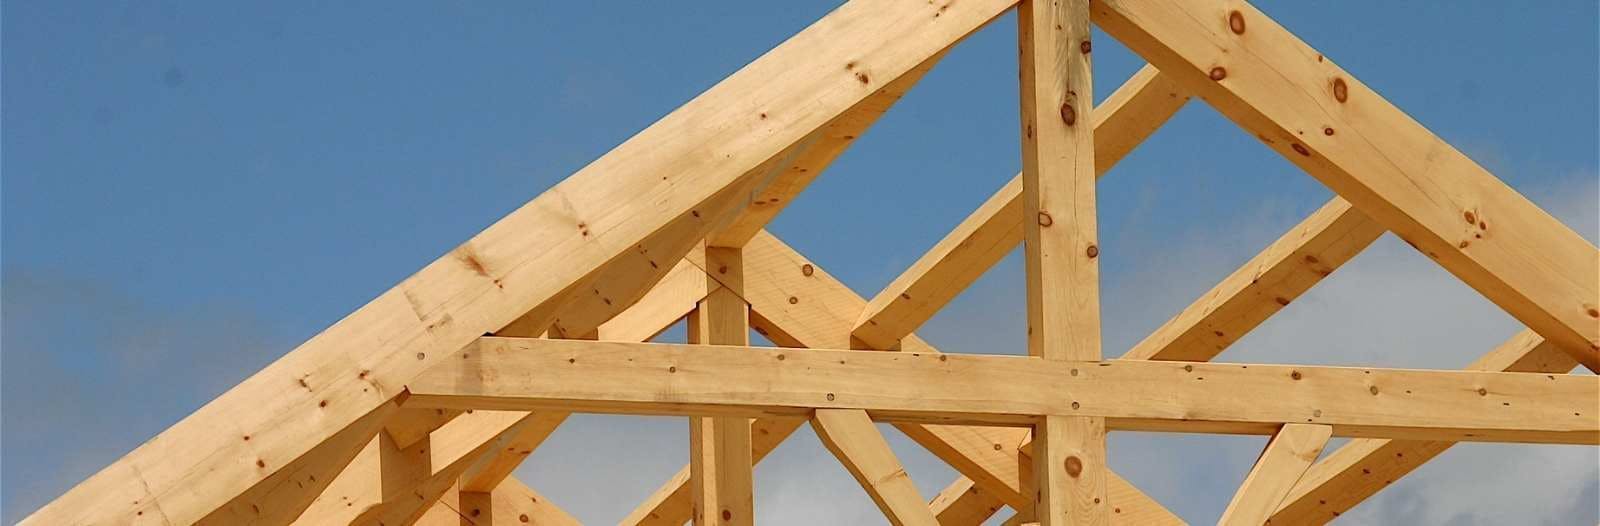
A dormer is a structure added to a pitched roof to create more usable floor area and head height. It usually has vertical walls and a roof of its own, with one or more windows.
Compared with a simple rooflight conversion, a dormer gives you a more traditional room shape. It can also make it easier to fit a proper staircase and furniture without awkward sloping ceilings everywhere.
Main dormer styles and best uses
Flat roof dormer
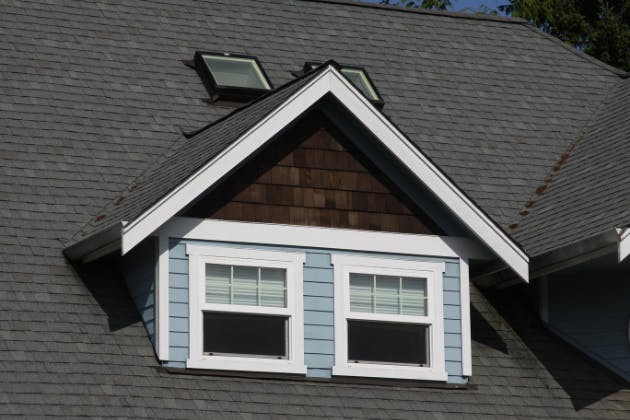
A flat roof dormer is the most common type. It has a flat or very shallow roof, with a broad face and near-vertical sides, often running across much of the rear roof slope.
This style typically offers the maximum headroom and floor space, which makes it ideal if you want a large bedroom with an en suite or need to fit a staircase comfortably.
Gable-fronted dormer
A gable-fronted (or doghouse) dormer has a little pitched roof that meets in a point at the front. It looks more traditional from the outside and can blend nicely with period properties.
It usually adds less internal space than a flat roof dormer, but can be a good choice if appearance from the street is a priority and you only need modest extra headroom over a bed or desk area.
Hipped roof dormer
A hipped roof dormer has three sloping sides to its roof. This softens the external look and can work well on homes that already have a hipped main roof.
Internal space is slightly reduced compared to a flat roof dormer, but it can feel more in keeping with the original property and may help with planning in more sensitive areas.
L-shaped dormer
An L-shaped dormer combines two dormers, typically on the rear main roof and the rear outrigger, forming an L shape when viewed from above. This is common on Victorian and Edwardian terraces.
It can create a surprisingly large, almost apartment-style space, ideal for multiple rooms or a generous master suite. It does, however, involve more structural work and design input.
Key practical points to think about
Before you fall in love with a particular dormer style, it helps to look at a few practical issues. These can strongly influence what is possible and how the space will feel once finished.
Head height: measure from joists to ridge to see how much room you have to work with.
Existing roof shape: hipped, gabled or L-shaped roofs suit different dormer options.
Stair position: affects layout, fire safety and how natural light reaches the landing.
Neighbours and party walls: shared walls and overlooking can affect design and permissions.
Head height and usable space
Head height is critical. As a rough guide, you generally want at least 2.2 m of clear height from existing joists to the underside of the ridge to make a comfortable room, especially once new floor structure and insulation go in.
A dormer can add headroom out towards the eaves, turning awkward sloping areas into more usable space. This is especially helpful for fitting a staircase without ducking and for creating full-height circulation routes.
Staircase and final layout
The staircase position will heavily influence the layout of your new loft rooms. Ideally, stairs should rise over the existing staircase to keep circulation compact and avoid losing a bedroom below.
A well-placed dormer can give headroom at the top of the stairs and provide a natural landing area. Poor stair placement can leave you with tight corridors, wasted corners or a compromised bathroom layout.
Roof shape, party walls and neighbours
Your existing roof shape will guide what dormer makes the most sense. Hipped roofs often need additional structural work or hip-to-gable alterations to gain enough space, while L-shaped rear roofs can lend themselves to L-shaped dormers.
If you share walls with neighbours, the Party Wall etc. Act may apply. You may need formal agreements before structural work starts, particularly when inserting steel beams or working on shared walls. Overlooking, overshadowing and how the dormer alters views from neighbouring gardens can also come into play at planning stage.
Planning permission and permitted development
Many dormer loft conversions fall under permitted development, which can avoid a full planning application if certain limits are respected. These typically relate to volume added, position on the roof, height, materials and overlooking.
However, flats, some maisonettes, homes in conservation areas and properties that have already been heavily extended may not benefit from permitted development in the same way. Always check with your local planning authority or a planning professional before committing to a design.
Even if full planning is not needed, you will still need to meet building regulations covering structure, fire safety, insulation, drainage and stair design. A reputable contractor will normally work with building control to ensure compliance.
Common mistakes to avoid
Underestimating storage
Loft conversions often mean losing existing eaves storage. If you do not plan for new built-in cupboards and smart use of low-level areas, the new rooms can quickly feel cluttered.
Consider integrated wardrobes in the dormer, drawers into the eaves and storage around the stairwell. This helps keep main wall space clear for furniture and circulation.
Poor natural light planning
Just adding a window to the dormer face is rarely the best you can do. Combining dormer windows with rooflights on the opposite slope can bring in cross-light and make the space feel much larger.
Think about window size, position and how they relate to bed, desk and sofa locations. Also consider privacy and potential overlooking for both you and your neighbours.
Ignoring disruption and access
A dormer loft conversion is significant structural work. Expect noise, dust and trades coming through the house for several weeks, even if much of the build happens from scaffolding.
Clear access routes, protect floors and agree working hours early. If you work from home, plan for quieter spaces during key parts of the build, such as steel installation and staircase fitting.
Checklist before you request a quote
A little preparation makes site visits and quotations far more accurate. Before you contact a contractor, gather:
Clear photos of the front, rear and sides of your house, plus the current loft space
Basic loft measurements, including height from joists to ridge and approximate floor area
Your preferred use for the new space, such as bedroom, home office or playroom
Notes on any previous roof alterations, extensions or structural work you are aware of
Ideas on staircase location and how you want the floor below to function after the conversion
Having this information ready helps a builder quickly assess feasibility and discuss suitable dormer types that work with your existing structure.
Next steps with JW Carpentry & Build
If you are considering a dormer loft conversion, a face-to-face discussion will give you a much clearer picture of what is achievable. JW Carpentry & Build can talk you through design options, structural requirements and how your chosen dormer will tie in with the rest of your home.
Start by looking at the Loft Conversions service page to understand the typical process. For homes that need extra support, our experience with structural work and steel helps ensure your project is safe and compliant.
To discuss feasibility and book a site visit, contact JW Carpentry & Build on 07710890538. With the right planning and expert guidance, your loft can become one of the most useful rooms in the house.